
Author: Written by a senior appliance technician with 14 years of field service experience. Based on repair logs, teardown patterns, and service calls on compact refrigeration units. Last updated October 2026.
Quick Answer
A low profile ice maker that is not working is usually dealing with one of two categories: an installation and airflow problem, or an internal component problem. In field service, the installation category is the more common and the more overlooked. Before replacing parts, confirm the model’s installation requirements, the ventilation clearance, and the ambient temperature. Only after those external checks should you consider internal causes such as water supply, sensors, control board, or the sealed refrigeration system.
This page is the low profile ice maker troubleshooting guide. For general ice maker faults that apply to all types, see the general troubleshooting guide referenced by title at the end of this article. For handle and housing problems on portable units, see the portable ice maker page referenced by title.
Introduction: Low Profile Ice Maker Not Working
A low profile ice maker that stops making ice, produces ice slowly, or shuts down after a short run is usually dealing with one of two categories of problem: an installation and airflow issue, or an internal component issue. In field service, the installation category is the more common and the more overlooked.
This guide is written for owners who already have a low profile ice maker installed and are now troubleshooting it. It is not a buying guide. If you are still deciding which unit to purchase, read the low profile ice maker buying guide referenced by title at the end of this article.
Safety first. If your low profile ice maker is leaking water, making grinding or scraping noises, emitting a burning smell, or showing a damaged power cord, unplug it immediately and stop testing. Do not continue to run a unit with an electrical or water leak symptom. If there is any sign of electrical danger, do not open the unit — have it inspected by a qualified technician.
This guide focuses on what you can check without disassembly. Most low profile ice maker failures are narrowed down by checking installation clearance, airflow, water supply, and the symptoms the unit is displaying. Only after those external checks should you consider internal causes.
Check Installation and Ventilation First
Low profile ice makers are compact refrigeration appliances. Their dimensions and installation requirements vary by model. The single most important step before any other troubleshooting is to confirm the unit is installed the way the manufacturer intended.
Why Installation Conditions Matter for Low Profile Ice Makers
A low profile ice maker produces heat as it makes ice. That heat has to go somewhere. If the unit relies on side, rear, or front ventilation and any of those openings is blocked, heat builds up inside the cabinet. The compressor runs longer, the ice production slows, and over time the compressor is stressed.
Key points:
- Low profile ice makers differ in how they vent. Some vent from the front grille, some from the sides, some from the rear. The owner manual for your specific model is the only reliable source.
- Under counter installation is not automatically allowed. Only models explicitly rated for built-in or under counter use should be installed that way.
- Low profile ice maker ventilation clearance cannot be inferred from the physical size of the unit. A unit that is 12 inches wide may still need several inches of clearance on the venting sides.
- Low profile ice maker installation requirements include ambient temperature. If the space around the unit exceeds the manual’s stated operating range, ice production will slow or stop.
Installation Check
Before doing anything else, verify the following:
- The model number matches the manual you are using.
- The unit is installed in a location the manual permits (freestanding, built-in, or under counter).
- The vent openings (front, side, or rear) are not blocked by cabinetry, walls, or stored items.
- There is airflow through the front grille if the unit is installed under a counter.
- The unit is level. A tilted unit can cause water distribution problems.
- The ambient temperature around the unit is within the manual’s stated operating range.
If any of these conditions is not met, correct it before running further diagnostics. Many low profile ice maker problems are resolved at this step.
Built-In vs. Freestanding: Why It Matters
Not every low profile ice maker can be installed under a counter. Freestanding units are designed to release heat from all sides. Built-in units are designed to release heat from the front grille only, and they are tested for that installation.
When a freestanding unit is installed under a counter, the side and rear vents are blocked. Heat accumulates inside the cabinet. The compressor runs hotter and longer than it was designed for. Ice production slows, and the compressor eventually fails.
Key points:
- Only install a unit under a counter if the manual explicitly permits built-in or under counter installation.
- Built-in models have a different venting layout than freestanding models.
- A unit that fits under a counter physically is not necessarily rated for under counter installation.
- If the manual does not mention built-in or under counter installation, treat the unit as freestanding only.
This is the single most common installation-related cause of low profile ice maker failure in field service.
Common Symptoms and What They May Mean
Use the table below to narrow down the problem. Do not jump to a component-level conclusion before completing the external checks.
| Symptom | Check First | Do Not Assume |
|---|---|---|
| No ice production at all | Power, control settings, water supply or reservoir level | Do not assume the compressor has failed |
| Low profile ice maker producing ice slowly | Vents, ambient temperature, visible dust on condenser | Do not assume low refrigerant based on slow production alone |
| Unit runs and then stops | Indicator lights, error codes, manual’s reset procedure | Do not assume the control board has failed |
| Ice is wet or melts quickly | Ice cycle time, ambient temperature, storage method | Do not assume a sealed system fault |
| Water leaks from the unit | Reservoir, drain, external water line if equipped | Do not assume the internal reservoir is scrap |
| Problem appeared after installation | Installation method, vent blockage, whether the unit is level | Do not replace parts before checking installation |
The purpose of this section is to narrow the problem, not to diagnose it. Complete the external checks in the next section before drawing conclusions.
Five Possible Causes of Low Profile Ice Maker Failure
The five categories below cover the most common reasons a low profile ice maker stops making ice or slows down. Each cause uses the same structure: symptom, external check, next step, when to call a technician.
Cause 1: Restricted Airflow or Dusty Condenser
Symptom: Ice production slows over time. The unit runs longer than it used to. The cabinet feels warm. In under counter installations, under counter ice maker airflow problems often start here.
External check: Confirm the vent openings are clear. Look through the front grille or rear vent with a flashlight. If the condenser fins are visibly coated with dust, pet hair, or kitchen grease, airflow is restricted.
Next step: If the manual allows user cleaning of the condenser, follow the manual’s procedure. If the manual requires disassembly, do not proceed on your own.
When to call a technician: If cleaning is not permitted by the manual, or if the unit does not improve after cleaning.
Cause 2: Water Supply or Circulation Problems
Symptom: No ice, or ice production stops mid cycle.
External check: Confirm the reservoir has water, or the water supply line is connected and flowing. Check the manual for the correct water level and any user-serviceable filter or inlet screen.
Next step: Refill the reservoir or correct the supply connection as the manual allows. Check for kinks in any external water line.
When to call a technician: If water is reaching the unit but no ice forms, or if the pump is not circulating water and the manual does not list pump service as user-level maintenance.
Cause 3: Bin-Full or Water-Level Sensor Issues
Symptom: Unit stops before the bin is full, or stops before the water is low. Indicator lights may behave unusually.
External check: Remove the ice bin if the manual permits. Wipe the sensor lenses with a dry, soft cloth as described in the manual. Confirm the bin is correctly seated.
Next step: Reinstall the bin and run a cycle. If the unit resumes, the sensor was the likely cause.
When to call a technician: If cleaning the sensors does not resolve the issue, or if sensor faults recur after cleaning.
Cause 4: Control or Power Problems
Symptom: Unit does not respond to controls. No indicator lights. Unit shuts off mid cycle without an obvious cause.
External check: Confirm the outlet has power. Check the manual for the reset procedure. Look for error codes on the display. Record any error code before doing anything else.
Next step: Perform the reset procedure exactly as the manual describes. If the unit resumes and runs normally, the earlier stop may have been a logic or power glitch.
When to call a technician: If the unit does not respond after reset, or if the same error code returns.
Cause 5: Compressor or Sealed-System Problems
Symptom: The compressor runs but no ice forms, or the compressor does not run at all. Ice production stops completely.
External check: Record the model number, the error code if any, and the conditions under which the unit stops. Confirm the outlet has stable power and the unit is not on the same circuit as a high-draw appliance. Confirm the ambient temperature is within the manual’s stated range. The compressor is not a touch-test component. The sealed system is not owner-serviceable.
Next step: Contact a qualified refrigeration technician. Do not open the sealed system. Do not judge refrigerant condition by oil residue on lines.
When to call a technician: Immediately. Compressor and sealed-system problems are not owner-serviceable.
Safe Troubleshooting Without Disassembly
The checks below can be done without opening the unit. Follow the order.
- Confirm the model number and locate the correct manual.
- Confirm the installation method matches what the manual permits.
- Confirm the vent openings are not blocked.
- Confirm the ambient temperature is within the manual’s stated range.
- Confirm the water supply or reservoir condition.
- Record any error codes and unusual sounds, then perform the manual’s reset procedure.
If the unit still does not produce ice after these checks, stop external testing and move to professional diagnosis. Do not power the unit while it is open. Do not test the compressor by touch. Do not judge refrigerant condition visually.
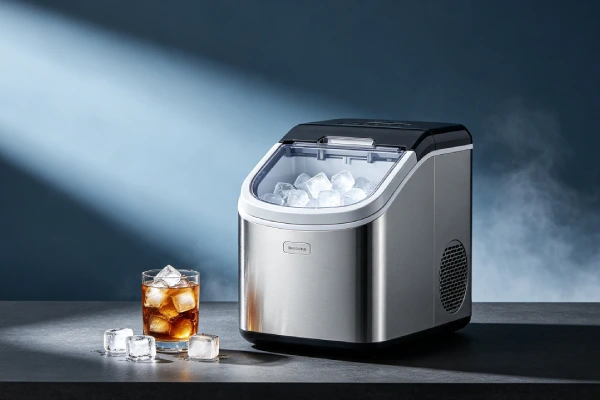
Condenser Cleaning and Routine Maintenance
Cleaning the condenser is the most useful user-level maintenance step for a low profile ice maker, but only if the manual permits it.
Before cleaning:
- Confirm the manual allows user cleaning of the condenser.
- Unplug the unit.
- Only access areas the manual identifies as user-serviceable.
- Do not bend condenser fins.
- Do not allow water into electrical areas.
- If the condenser is not reachable without removing the outer cabinet, this step should be done by a qualified technician.
After cleaning:
- Reassemble the unit exactly as the manual describes.
- Plug the unit back in.
- Run a cycle and note whether ice production improves.
Do not use compressed air to clean condenser coils. Compressed air drives dust deeper into the coil and into the compressor compartment.
For the full cleaning and descaling procedure, see the how to clean and descale an ice maker guide referenced by title at the end of this article.
When Professional Diagnosis Is Needed
If external checks do not resolve the problem, further diagnosis is needed. At this stage:
- Record the model number.
- Record any error codes and the conditions under which they appear.
- Record the symptoms and when they began (for example, immediately after installation, after a move, or after a period of normal operation).
- Do not power the unit while it is open.
- Do not attempt to diagnose compressor or sealed-system health by touch, sound, or visual inspection of oil.
- Refrigeration systems, electrical components, and any repair that requires opening the cabinet should be handled by a qualified technician.
The point of professional diagnosis is to determine whether the failure is a serviceable component problem or a sealed-system problem. That distinction drives the repair versus replace decision.
Repair Cost: Fix or Replace?
The decision to repair or replace depends on several factors, not on a fixed month count. Consider the following.
| Repair Situation | Factors to Consider |
|---|---|
| Restricted airflow or permitted routine cleaning | Whether the issue can be resolved by external maintenance |
| Water or pump problems | Whether diagnosis is clear, parts are compatible, and the unit is still under warranty |
| Sensor or control problems | Whether the fault is confirmed and whether replacement parts exist |
| Compressor or sealed-system problems | Quote, technician capability, warranty status, and replacement cost |
| Installation-related problem | Whether the installation location or ventilation method needs to be changed |
Low profile ice maker repair cost and low profile ice maker fix or replace decisions should be based on the actual quote, warranty status, parts availability, confirmed diagnosis, and the current price of a replacement unit. It should not be decided by a fixed age threshold alone.
Preventing Installation-Related Problems
Most low profile ice maker problems that are not component failures trace back to installation. The following checklist reduces that risk.
- Confirm the model and read the manual before installation.
- Confirm the installation method (freestanding, built-in, under counter) is permitted.
- Confirm vent openings are not blocked.
- Confirm low profile ice maker ventilation clearance around the venting sides per the manual.
- Clean user-serviceable components at the interval stated in the manual.
- Descale according to the manual and your water quality.
- Check for leaks, unusual sounds, and error codes periodically.
- Do not assume every model requires monthly descaling or distilled water. Follow the manual for your model.
FAQs
Why is my low profile ice maker not making ice?
Start with installation and ventilation. Confirm the vents are not blocked, the unit is level, and the ambient temperature is within the manual’s range. Then check water supply and reservoir condition. Only after those checks should you consider internal components such as the pump, sensors, control board, or sealed system.
How much clearance does a low profile ice maker need?
Low profile ice maker ventilation clearance depends on the model. It cannot be inferred from the physical size of the unit. Check the installation section of the manual for the required clearance on each venting side.
Can a low profile ice maker be installed under a counter?
Only if the manual specifically allows built-in or under counter installation. Many low profile units are freestanding only. Installing a freestanding unit under a counter can block ventilation and cause overheating.
Why did my ice production slow after installation?
The most common reason is restricted airflow. If the unit is installed in a space with limited ventilation, heat cannot escape and ice production slows. Check the vent openings and ambient temperature first.
When should I call a technician?
Call a technician when external checks do not resolve the problem, when the unit shows an error code that returns after reset, when water is reaching the unit but no ice forms, or when the compressor or sealed system is suspected.
Is it worth repairing a low profile ice maker?
It depends on the confirmed diagnosis, the quote, the warranty status, and the price of a replacement unit. A repair that is a substantial fraction of the replacement cost, on a unit that is out of warranty, is often not worth doing. A confirmed, low-cost repair on a unit still under warranty is usually worth doing.
How do I know whether the compressor has failed?
You do not confirm a compressor failure by touch, sound, or visual inspection on your own. A qualified technician confirms compressor and sealed-system condition with the correct tools. If ice production stops completely and external checks do not resolve it, that is the point to call a technician. See Cause 5 for details.
Quick Troubleshooting Checklist
| Symptom | First External Check | Next Step |
|---|---|---|
| No ice production | Power, controls, water supply | Check installation and vents |
| Low profile ice maker producing ice slowly | Vents, ambient temperature, visible dust | Clean only what the manual permits |
| Unit runs then stops | Indicator lights, error codes, reset procedure | Record codes, retry reset |
| Wet or soft ice | Ice cycle, ambient temperature, storage | Check ambient and storage conditions |
| Water leak | Reservoir, drain, external line | Unplug; correct leak source before restart |
| Problem after installation | Installation method, vent blockage, level | Correct installation before further testing |
Conclusion
If your low profile ice maker is not working, the decision path is clear. Check installation first. Check ventilation and airflow second. Check water supply and sensors third. Only then consider the compressor or sealed system.
The repair versus replace decision should be based on the confirmed diagnosis, quote, warranty status, and replacement price. If the fault is installation-related or a user-serviceable component, repair is usually worth doing. If the fault is in the sealed system, and the unit is out of warranty, replacement is usually the better decision.
Related Guides
- Portable Ice Maker Handle and Housing Problems
- Ice Maker Not Making Ice Troubleshooting
- How to Clean and Descale an Ice Maker
- Low Profile Ice Maker Buying Guide